- /
- /
- /
Filtering files when migrate data to SharePoint
If you plan to move files between File Share and SharePoint, you will have use cases where it is just not desirable to copy certain files. Filtering files functionality is required to fulfil this use case.
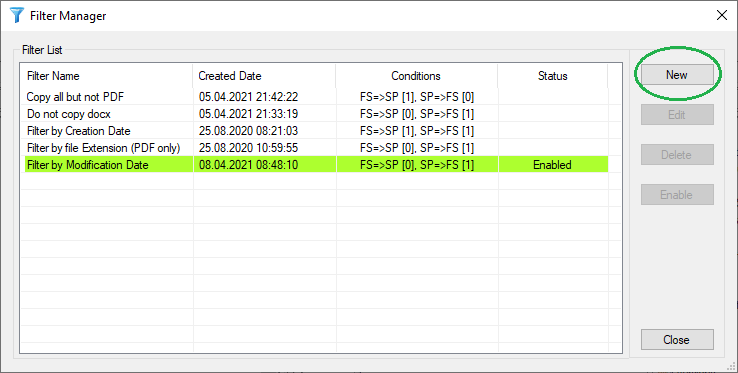
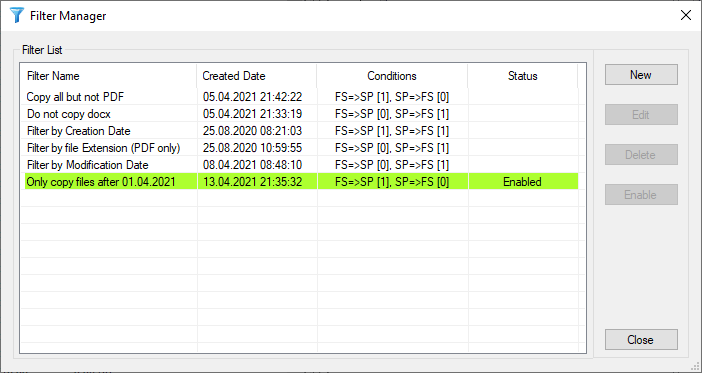
DMS-Shuttle offers a filter manager with which you can create and manage a list of filters.
With the filter manager you can define new filters, edit or delete existing filters and activate or deactivate a filter.
- You can only open the Filter Manager if you are connected to a SharePoint site.
- Only one filter can be used (activated) for an established SharePoint connection.
- A filter is a set of conditions (at least one condition is required).
Steps to define a filter:
A) In Filter Manager click on the button “new”
B) In Filter settings dialog do the following steps:
- Define a meaningful name for the filter (e.g. “Files modified after 01/01/2020”)
- Select the direction (File System to SharePoint or SharePoint to File System)
- Choise an attribute from the list of available attributes
- Select a condition
- Enter a value
- Add condition to the list of conditions
- Finish and close the dialog with the “Ok” button
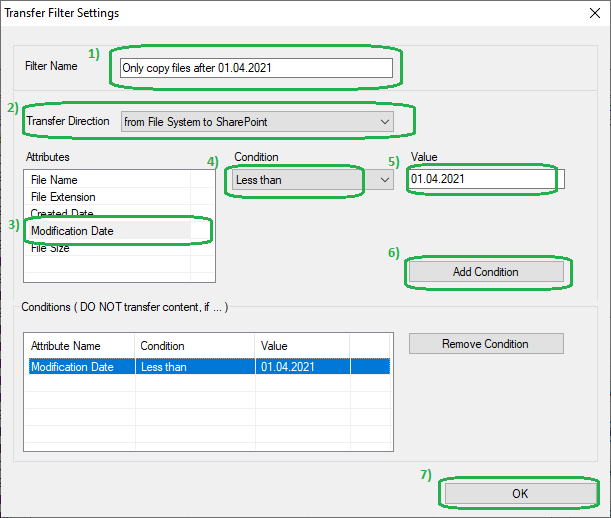
The filter example in the screenshot above ensures that only files are migrated that were created or updated after April 1st, 2021.
C) In Filter Manager select the filter and click on the “Enable ”button
In order for the filter to take effect, the filter must be activated. To do this, select the filter in the list and click on the “enable” button.
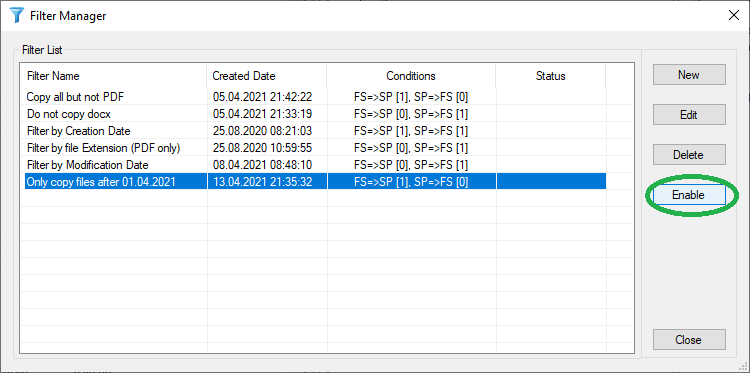
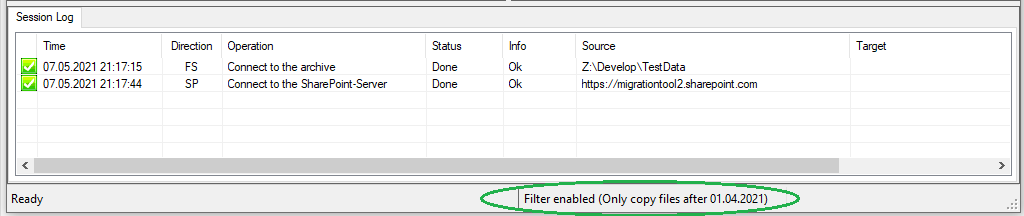
If a filter is enabled, you can see this in the filter manager (the filter entry is green marked and “Enabled” in the status column). In addition, you can see the name of the activated filter in the status bar of the main window.
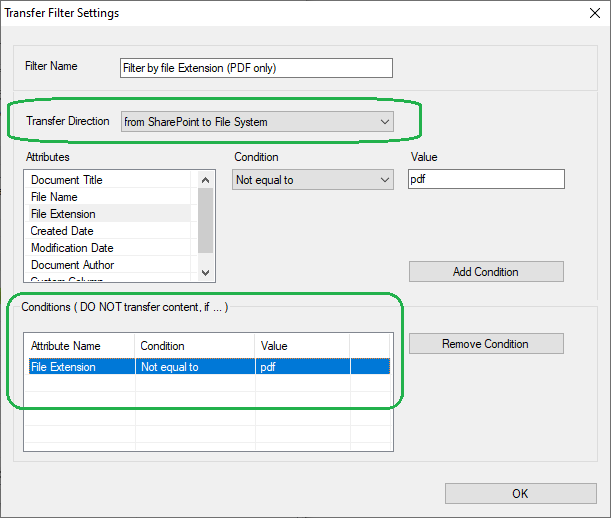
Filter settings samples
Filter by file extension: The filter example in the screenshot below ensures that only PDF files are downloaded from SharePoint.