- /
- /
- /
Install DMS-Shuttle for LiveLink
1. Download DMS-Shuttle
Download DMS-Shuttle for LiveLink from our Website to your local system. Download Page >>
2. Install DMS-Shuttle for LiveLink
DMS-Shuttle can be installed on every Windows computer that has Internet (or Intranet) Access. No server installation is needed.
Prerequisites:
- .NET 4,5
- .NET 3.5 SP1 (please read on Microsoft Site how to install .Net 3.5 on Wiindows 10 / 8 / 8.1)
- Microsoft Visual J# 2.0 Redistributable (download from Microsoft Site)
Set Compatibility Mode for the Redistributable Installer:
- Navigate to the downloaded Visual J# 2.0 Redistributable installer.
- Right-click the installer file and select “Properties”.
- Go to the “Compatibility” tab.
- Check the box for “Run this program in compatibility mode for” and select “Windows XP (Service Pack 3)” from the dropdown menu.
- Check the box for “Run this program as an administrator”.
- Click “Apply” and then “OK”.
Install the Redistributable:
- Double-click the installer file to run it.
- Follow the on-screen instructions to complete the installation process.
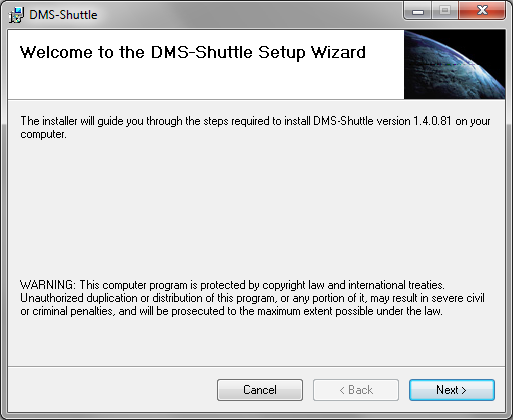
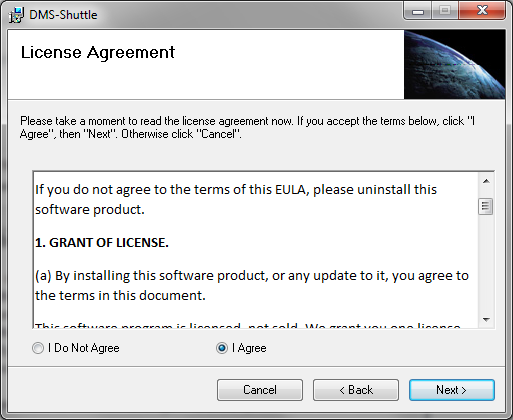
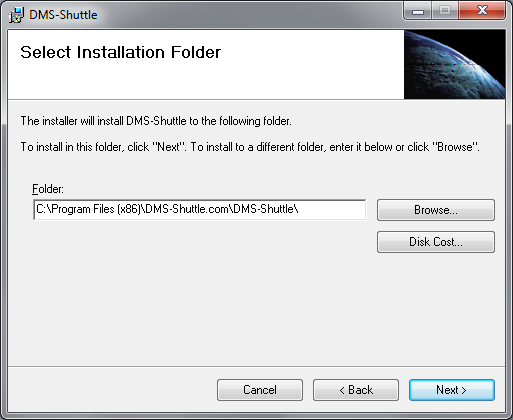
Installation Steps / DMS-Shuttle for LL:
Launch the Setup Installer (setup.exe).
Read and accept the terms in the End User License Agreement.
Select the Installation folder (or keep the default installation location)
Click “Next” button
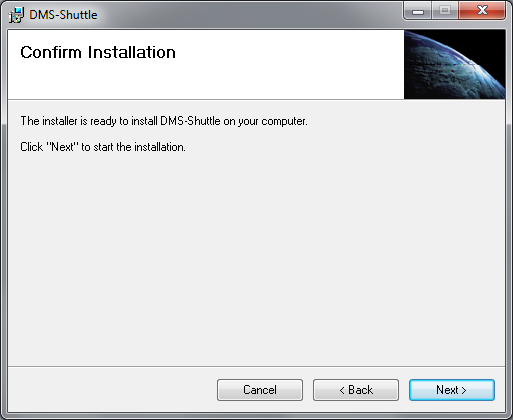
Wait for the installation process to complete. Then you can close the dialog and launch the tool.

You will then have 15 days to try out the product and make sure that it fits your needs.